Showing posts with label recipes. Show all posts

Friday, February 24, 2012

Chicken-Roasting 101

In my blushing bride days, I was friends with a group of women who all stayed at home with their babies and honed their housewifely skills. We were talking about feeling somewhat capable in the kitchen when my friend Leslie said, "Oh, not me. I've never even roasted a whole chicken!"

Is that the standard, I thought? Because I had never roasted a whole chicken, either. And I never remember my mother messing with a whole bird. Well, I take that back. I remember her cutting a raw bird apart. But mostly I remember her buying chicken pieces.

But I took Leslie's comment as a challenge. And now it is a favorite meal for my family and me. It feels Sunday dinner-ish, though I don't like for it to be in the oven for the whole length of time we tend to be away at church. I make it when I want to be celebratory about a family meal.


Here's the very simple method I've decided upon, and it can certainly be tweaked according to tastes:

Remove giblets, if included, from the raw bird's cavity. Save them for the gravy, or don't.


Stuff the cavity with the flavorful vegetables of your choice. I always, ALWAYS use onions and celery, at the very least. Sometimes I throw in a carrot or something that needs to be used,but if I find I don't have onions or celery on hand, I put the bird back in the fridge and save it to make when I am better supplied. Also, I seldom chop the vegetables this finely. Usually the celery sticks are sticking immodestly from all the crevices as I put it into the oven.

And I don't go to the trouble of lacing up the chicken with special kitchen string. Look, the purpose of roasting the vegetables with the chicken is to bump them right up together so that the flavors mix. This is adequately done without getting all tidy about it, so you better believe I don't do it if I don't have to.


Next I season it. Sometimes with salt and cracked pepper, sometimes with garlic salt.

I put the roaster in a preheated oven - about 350. I find a typically-sized bird takes between 1.5-2 hours until the breast juices run clear.


I cannot serve this meal without mashed potatoes. Last night, I barely had time to get the potatoes tender in order to get my family off to their evening activities, but it is a non-negotiable menu item when we roast a bird.

Monday, February 13, 2012

Coconut Shrimp


I had a pretty stellar day today. There was nothing on the calendar so I was productive at home for much of the day, which is overdue and felt so welcome.

Then we took the family to the Recreation Center in my town and played some raquetball. I do find I need to step up the physical activity now that I've hit the 40-year mark, and I definitely prefer to be active by playing fun games rather than the gerbil activity of the treadmill.

My local supermarket had a special on some fancy seafood this weekend. I snapped some up and Sophia made a feast for dinner. Crabcakes! Pan-seared scallops! And today's recipe - Coconut Shrimp with an orange dipping sauce.

I never find seafood recipes to be too much trouble, and they always cook so quickly. I even deveined the shrimp myself, which I've never done before, and it was not a very squeamish job, thank the lord.


2 C. shredded coconut (sweetened)
2 c. bread crumbs
Kosher salt and ground pepper
2 c. flour
4 large eggs
24 large shrimp, peeled and deveined
Vegetable oil for frying

Dipping sauce:
1/2 c. orange marmalade
1-2 T dark rum


In a large bowl, combine coconut and bread crumbs and season with salt and pepper. Coat each shrimp in flour, dredge in eggs, and roll in the bread crumb mixture.


In a Dutch Oven, heat 1/2 inch of vegetable oil to about 350 degrees. Fry the shrimp in batches until golden brown and cooked through - about 3-4 minutes per batch. It is a quick process and not troublesome, but DO take care not to overcrowd the shrimp in the cooking process, nor to cook them too long.

Drain on paper towels.


For the dipping sauce, heat the marmalade in a small saucepan and thin with rum as desired. Serve immediately.

Monday, January 16, 2012

I'm back. The computer, however, is still not back. It spent a week and a half at the Computer Healer, who threw up his hands and banished it from his shop. We sent it on to the Computer Exorcist to see what he can do. So I snagged Brooks' girlfriend (Just kidding - it's his laptop. We call it his girlfriend because the two of them are inseparable.) to do some posting.

We had a bit of a snowstorm in my neck of the woods. The girls had been dying to make Snow Ice Cream, which they'd heard of but never sampled. For a couple of years, they'd had this recipe in the backs of their minds, but the timing and the catching of clean snow never worked out.

Until this week. The minute Ava heard about the impending snow storm, she put a clean washtub out on the stoop to catch the pristine flakes. (She also put spoons in the freezer and ice cubes in the toilet.... Have you ever heard of those Snow Day Supersticions?)

So Saturday night - the measuring and mixing.

2 cups milk
1 cup confectioners' sugar
1 tablespoon vanilla extract
1/4 cup unsweetened cocoa powder
1 teaspoon powdered instant coffee
1 gallon clean fresh snow

1. In a bowl, whisk together the milk, confectioners' sugar, vanilla extract, cocoa powder, and instant coffee until the sugar has dissolved and the mixture is smooth.
2. Place the snow into a large bowl, and pour the chocolate mixture over the snow. With a large spoon, stir until the snow ice cream is thoroughly combined. Serve immediately.

This was a fun recipe to make and it felt good to check it off of our Recipe Bucket List, but it wasn't delicious or anything. After a couple of bites, the kids realized that it was ice cream without the... you know.... CREAM. In our mouths, it tasted like a sweetish and chocolatey water, really. A bit unsatisfying.

A few bites were enough.

Thursday, December 22, 2011

Grimmle Boi


Lest you think I'd forgotten, the recipe for Grimmle Boi (Crumb Pie) is now posted at Part 2.

Monday, December 12, 2011

One Big Weekend - Four Small Posts...Part 2


The Amish Relatives

One joy of family hardship is the coming together of all the relatives. My husband was never Amish, his parents were never Amish, but beyond that, all bets are off.

After the funeral, the local tradition is for the church to provide a meal for the family and anyone else they wish to have as guests. It's a nice way to allow more time for visiting and a chance to maybe get cheerful again after the goodbye in the church. About 20-30 Amish relatives stayed for this (as well as the 50-75 non-Amish) and my husband made a beeline for them as soon as he did his fatherly duty by eating with this household. He thinks they are fun and sassy and "good people." I agree.

At his grandmother's funeral dinner several years ago, Michael trotted some of these ladies over to me saying I wanted to ask questions about why Amish women did the things they did. Indeed, I had been asking a lot of questions during our years of driving through the Amish countryside in the area where we live. These women seemed reluctant and a bit suspicious, not hankering to answer a bunch of ignorant questions from a worldly English girl. (I don't have ancestors from England... English is just what the Amish call the non-Amish.) But my husband had forced the issue. I furrowed my brow intelligently and leaned in to ask, "Why are your gardens in the front yard?"

They looked at one another and shouted their laughter at me. One howled, "Well I'm not about to put it in the back where the horses poop!"

[Not long ago, an Amish relative passed away who had been close enough to my immediate in-law family that we all went to the funeral. My formerly-Amish friends advised me not to take the kids - Amish funerals are long, uncomfortable and not in English. But I decided that cultural issues were not valid reasons for not paying respects which you would ordinarily offer, so I put my kids in their starched collars and drove them to the farm where the funeral was held.

The service was held in the family's pole barn/shop where an open space was cleared for rows of backless, wooden benches for the bereaved. We sat on those benches and, yes, the service was long and, yes, impossible to follow for a non-Pennsylvania Dutch speaker. But what a rich experience for me and my kids - who were PERFECTLY behaved as I recall - to have. Without being too detached and academic over the sad loss of a close family's beloved, I certainly watched the proceedings with interest as well as compassion, wanting to commit it all to memory.]

Anyway, our interaction at Aunt Bonnie's funeral dinner was lighthearted with those fun Amish relatives, to whom we refer by long, geneology-informed descriptive names (Elmer T.'s Larry Mary) and who know all our relatives, too, even the ones we didn't know we had. When Michael and I were first married and I was a substitute teacher in the school system out in the country, an Amish boy approached me in the hall to say he had read the paper and seen our wedding announcement and that we were now cousins.

This time Michael had called us over because our formerly Amish friend, Dean, had told me that his mother's best dish was was "grimmle boi," (Margo, do you know what I mean?) a phrase which has subsequently become a catch-all in our home because it is fun to say. It's now used as an all-purpose swear word, a replacement for forgotten song lyrics, whatever the situation requires. The Amish wanted to hear us say "grimmle boi" and laugh at our accents and discuss their own recipes for "bois" of all types.

Ooh, how I want to hang out in their kitchens, rummage through their pantries, remove their bonnets and inspect their hairpin configurations!

I'll post the recipe after you've have a chance to wonder and Margo a chance to answer!

Updated 12/22

Grimmle Boi (or Crumb Pie)
In a saucepan, combine:
1/2 c. brown sugar
1 T flour
1/2 c. light corn syrup
1 c. hot water
1 t. vanilla

I mixed this before turning on the heat so that the lumps were removed from the flour. I brought it to an easy boil, stirring constantly, until I was sure the sugar was dissolved.

Pour mixture into an unbaked pie shell. Cover with crumbs.

Crumbs:
1 c. flour
1/2 t. soda
1/2 t. cream of tartar
1/2 c. brown sugar
1/4 c. butter

Bake at 350 for 45-60 minutes.

Wednesday, October 26, 2011

Chicken Fricassee


The kids and I returned home on Monday evening from a quick and wonderful trip. I'll not say precisely where I went because I did get the chance to visit with, and interview, two homemakers that I admire. Those interviews will appear here at some point, and once I bring them into the picture, I think it's important that I make them feel safe by protecting their privacy as much as possible. Thanks for letting me into your homes, girls.

Our little trip coincided with the ending of Brooks' football season. Literally, we waited until he had turned in his equipment, and then left town. The season was good in the way it kept him active and involved with his peers, but it was havok for our family meals. Michael would delay leaving work until it was time to pick Brooks up after practice, which also delayed our dinner time for an hour. Because Michael wasn't home, I was overseeing the girls' homework and activities on my own. I hadn't realized how much I relied on my good husband for that.

What with one thing and another, my meal preparation has dwindled to sandwiches and semi-homemade kinds of things. My goal for feeding my family became Lack of Starvation instead of beautiful, tasty, lovingly prepared food. Having seen the end of football season, and the homes and tables of some inspiring homemakers, I rushed off the interstate and into my kitchen.

Last night we had fricassee de poulet a l'ancienne, or, more familiarly, Chicken Fricassee. From Julia Child's Mastering the Art of French Cooking. Prepared in this way:

1 chicken, cut up for frying
1 sliced onion
2 diced carrots
2 stalks of celery, diced
4 T butter
1/2 t. salt
1/4 t. white pepper
3 T flour
3 c. chicken stock
1 c. white wine or 3/4 c. vermouth
bouquet of parsley sprigs, bay leaf, thyme, tied up in clean cheesecloth


Cook the carrots, celery and onion in the butter in a medium hot skillet for about five minutes, or until they are almost tender but not browned. After, push the vegetables aside and add the chicken. Turn them every couple of minutes. They will get firmer, but not browned. Cover the pan, lower the heat and continue to cook for 10 minutes more, turning now and then.

Meanwhile, in another pan, simmer together the chicken stock and vermouth and herb bouquet. I have started to really love the taste of meat cooked in wine and this is the broth that will do it for you. Taste this stock for seasoning and add some salt if you think it's necessary.

After the ten minutes of covered cooking, use the salt, pepper and flour to coat the chicken. Cover and continue cooking for another 4 minutes, with another turn in the middle.


Pour the simmering stock mixture over the chicken and vegetables. Bring it all to a simmer. Cover and maintain for 25-30 minutes or so. You know, until the chicken is done. Stab a big piece and look for clear juices if you're not sure. Remove the chicken to a waiting dish.

Onion and Mushroom Garniture

Julia wanted me to use 16-20 tiny white onions, which I didn't have, so I just used another medium yellow one, as I had for the vegetables in the chicken. Also, 1/2 lb. fresh mushrooms, stewed in butter, lemon juice and water. Add the leftover stewing juices to the chicken in the next step.


From the chicken mixture, skim the fat, then raise the heat and boil rapidly, stirring often. The sauce will reduce and thicken. You will want about 2 1/2 c. for the sauce. (At this point, I spooned some of this into the risotto I was cooking as a go-with. I also reserved some for my chicken stock for a later meal.)

The sauce

2 egg yolks
1/2 c. whipping cream


Blend egg yolks and cream in a mixing bowl with a wire whip. Continue beating and add the hot sauce by tablespoonfuls until about a cupful has gone in, then you can add the rest and beat thoroughly.

Pour the sauce back into the casserole. Set over a medium high heat, stirring constantly, until it comes to a boil. Boil for one minute.

Correct seasoning, adding drops of lemon juice, salt, pepper, even a pinch of nutmeg if you like.

Arrange the chicken and mushroom/onion garniture and pour the sauce over all. Serve immediately.

French cooking is a little time consuming and fiddly. Though American food can be tasty, it is usually prepared quicker and more efficiently, thus missing the deeper flavors provided by all these endless steps. Let me know if you try it.

Friday, August 26, 2011

Meeting the Family's Bread Needs - Part 3


This will be a long post because of the clear instructions Kevin offers in his recipes. I will also include the links back to the original posts that helped teach him to be a bread baker. You will find the following recipes, with Kevin's tips: Pretzel Rolls, French Bread, Half Whole Wheat.

PRETZEL ROLLS (This is the bread that Kevin's girls shared with me at their first piano lesson of the summer. It gives that unmistakeable "pretzel-y" flavor on your tongue, caused by poaching in the soda water before baking.)

Dough:
1 ½ (340 gr) cups warm water
1 T yeast
2 t sugar
4 ½ (663 gr) cups bread flour (original recipe called for unbleached all-purpose)
2 teaspoons salt (I use kosher)
4 T unsalted butter, melted
Other:
1/4 cup baking soda
large saucepan of water (2 qts)
1 egg, lightly beaten
pretzel salt (again, I use kosher)
1. Mix yeast, water, sugar, flour, salt and butter with dough hook until dough is silky and not sticky.
2. Put dough in a greased bowl and cover with plastic wrap or a damp tea towel (not terry cloth) and let it rise until double (about 60 mins).
3. Punch down and turn out onto a lightly floured surface.
4. Put parchment paper in two baking sheet pans.
5. Cut dough into 3 ounce portions.
6. Shape portions into balls or demi loafs. Be sure to pull the skin of the ball tight and seal seams.
7. Place formed rolls, seam side down, on the parchement paper. Leave at least 1 inch between each roll.
8. Space evenly on the prepared sheet pans, pinched seam side down, leaving at least 1” between each roll.
9. Cover with a tea towel or a light film of plastic wrap and let rise in a warm place for 30 minutes until doubled.
10. Preheat oven to 425°F and place oven racks on the lowest and middle positions.
11. In a large saucepan, bring 2 quarts of water to a low boil.
12. Add the baking soda and lower heat to a simmer.
13. Slip the rolls into the soda water, seam side down.
14. Poach for 30 seconds then turn rolls over
15. Poach other side for 30 seconds then remove with a spider or slotted spoon to the same prepared sheet pans, seam side down.
16. Repeat with the remaining rolls, leaving at least 1” between rolls for baking.
17. (I find this step optional) Make an eggwash and brush rolls all over.
18. Top each roll with a sprinkle of pretzel (or kosher) salt.
19. Slash each roll with a sharp knife. An X looks pretty on the balls; the demi loafs are pretty no matter how you do it.
20. Bake the rolls for 15-20 minutes, rotating the pans halfway through baking – top to bottom, front to back – for even browning.
21. Cool on cooling rack. Seriously. Let them cool. Unless you don't want to. Dang these things are good. You just do what you need to do. I won't tell.


FRENCH BREAD

4 c (624 grams) bread flour, divided
2 t yeast
2 t salt
1 1/2 c (340 grams) warm water
1. Save back about a ¼ cup of bread flour. Put rest of flour in mixing bowl.
2. Add yeast to one side of the bowl, salt to the other.
3. Pour water and mix on low with the regular paddle until combined and shaggy.
4. Switch to kneading hook and mix for 2 minutes.
5. Let dough rest about 5 minutes. Adjust with a little flour or a little water.
6. Mix again for about 3 minutes. Remove dough from bowl and hand knead, adding flour as needed from the flour you had set aside. Dough should be smooth and firm.
7. Place dough in oiled bowl. Turn dough over to oil all sides of the dough. Cover and let rise until double, about 60 to 90 minutes.
8. At about an hour into the rising, move oven rack to the lowest shelf, preheat oven to 450 and place baking or pizza stone in oven for the preheat.
9. Once doubled, turn dough out on lightly floured counter. Stretch and fold back the far edge, then the right, the the front, then the left.
10. Divide dough in half. Form into loaves (I like boules or large, round loaves).
11. Take a baking sheet and turn it over. Place a rectangle of parchment paper on the inverted sheet and place loaves on the paper. Cover with plastic wrap or a damp tea towel. Let loaves rise until doubled.
12. Slash loaves as desired.
13. Slip loaves onto pizza/baking stone.
14. Bake 20-25 minutes. Internal temperature will be 195-205 when done.
15. Let bread cool on wire rack. The loaves won't be ready to eat until completely cooled. Loaves can be warmed up in oven if warm bread is desired.

Optional: You can create steam in the oven if you place a cast iron skillet on the floor of the oven when you start the preheat. When you put the loaves in, toss about 4-6 ice cubes in to the skillet and close the door quickly. Some cooks have tossed ice right on the oven floor, but I've also read this can warp the bottom of the oven. TAKE CARE to not get oven window wet as it might shatter.


HALF WHOLE-WHEAT

1/4 (85 grams) cup honey
1T yeast (I use instant or bread machine yeast)
2 cups (454 grams) water
2 1/2 cups (376 grams) bread flour
2 1/2 cups (376 grams) whole wheat flour
2 teaspoons salt
2 tablespoons olive oil

Whisk together honey, yeast, and water.

Add both flours and use kneading hook of mixer until just combined. The dough will be rough and shaggy. Cover and let it rest for 10-15 mins.

Add oil and salt. Knead on medium to medium low for about five minutes. The dough will be smooth and stretchy.

Form a ball and place in an oiled bowl. Turn dough in bowl to cover with oil. Cover with plastic wrap or damp tea towel (not terry cloth). Set aside until doubled (about an hour)

Halfway through the rise, preheat oven to 375 degrees. Place baking stone(s) in the oven to preheat with the oven.

When dough is doubled, roll it out of bowl. Punch down dough by stretching the far edge out and fold over. Do the same on the left, front and right edges.

Divide dough in twain. Cover with plastic wrap (or two bowls) and let it rest for 10-15 minutes.

Pat doughs out into circles and dimple with fingers to pop any large pockets of gas. Form into loaves for bread pans or free form of your choice. Cover with oiled plastic wrap or damp tea towels. Set aside until doubled.

Slash top if desired. Put loaves in oven. Reduce temperature to 350 immediately. Bake 40 mins or until instant read thermometer reads 200 to 205 degrees.

Remove from pan if applicable and set on cooling rack. Bread must be completely cooled before slicing (instant read around 80 degrees)

____________________________________________________________

I want to close by thanking Kevin for taking the time to do this interview and being willing to share his knowledge. It was my pleasure to pick his brain and share the pickings with you. I'm proud of him and his baking accomplishments.

Thursday, June 16, 2011

Chewy Brownies

Here is some scary math for you: If a=a two-week vacation and b=a departure date this Friday, c=a return date a day before Leadership Camp, d=5 4-H projects for which e=a due date the day after Leadership Camp, then a(b+c) + de=a personal due date of This Friday for all projects and my stress level to the seventh power.

This is always busy time in our household. We are finishing up the last week of Little League with games nearly every night of the week. I'm trying to prepare for vacation, with jobs like making the van spic and span, laundry, packing, and - as my mother-in-law has always done - vacuuming myself out the door. I also have the big job of overseeing the time management of my 4-H-er.

What can console me at a time like this? Baked goods. For an end-of-the-year choir activity, Brooks volunteered me to provide brownies. This recipe comes out just as I like them - not too dry, not too cakey.

And now, to make you laugh and me cry, I find that I have loaded these pix in the order they were taken, making them appear in the reverse order than which they are needed. Please scroll to the bottom if you care to read the recipe from the beginning. (It really is funny, I suppose.)


Wednesday, May 18, 2011

Salmon on the Grill


Here's what I had for dinner last week. Salmon was at a good price at the supermarket and that is one fish I just adore. Having been enjoying a day of sunshine in the midst of torrential rains, I decided it must be prepared on the grill.

I got out a giant sheet of foil (cause this was a giant slab of fish) and drizzled a bit of olive oil on it. In my memory somewhere it seems I've seen a light olive oil packaged in a spray bottle. It always seemed needlessly fussy to me. I mean, who can't manage the distribution of their olive oil, after all. But on this day I wished for one for I only wanted just the lightest of coatings to avoid a stick.

I distributed two cloves of garlic (minced) and 1/2 t. tarragon over the salmon and folded the foil around it, crimping it shut two or three times over to avoid leaking any fantastic juices.

What's so great about fish is the quick cooking, and heaven forfend that it overcook. I slammed this puppy on the grill for ten minutes and it was perfect.

Unwrap and serve with something green, from the garden and fabulous.

Just look at those flakes!

Wednesday, May 4, 2011

Apple Crumb Pie

It's Teacher Appreciation week again in our local school system. The PTO at my girls' school provides a meal for the staff on the Wednesday of this special week. For three years I've been asked to provide all the homemade pies for dessert, and for three years I've agreed to the task.

This year I hadn't heard anything about the meal until quite late. I stopped in the office a couple of weeks ago on my way to volunteer in Ava's classroom. The principal turned all smiley and charming and told me the teachers really hoped to get homemade pies again this year. I thought it was strange I hadn't heard anything from the PTO yet. After a little investigating, I learned that my buddies in the Parent/Teacher Organization had set out to protect my busy schedule (and sanity) and had taken the homemade pies "off the table."

I never thought of myself as the co-dependant type, but knowing that a group (or even just one person) wanted some of my baking so badly caused me to volunteer to donate time I didn't have if PTO would cover the expenses. And so, after getting home from the Little League field at 8:30 PM on Tuesday, I set to work.

I planned to make six pies and that's what I made last year, but I think I accidentally made seven. My pies were: apple crumb, rhubarb, strawberry, frozen coconut, peach cream, peanut butter, and banana cream. Whenever I make a large batch of pies, I like to make both peanut butter and banana cream because I can just make an extra large batch of vanilla pudding and either pour it over peanut butter crumbs or banana slices. The pies definitely got eaten, but the banana pie was the last one (by far) to be chosen. I wonder if I should make it again.

The quickest to disappear were the strawberry and rhubarb.

If I did it for the adulation, I was not disappointed. I'm a little embarrassed about how much it meant to me.

Here is my recipe for Apple Crumb Pie.

3 c. peeled and sliced apples (I like Granny Smiths for baking.)


1 c. sugar


2 T flour
1 dash of cinnamon


1 unbaked pie shell


Mix these first four ingredients together in a bowl.


Then, put in unbaked pie shell.


Make crumbs of the following:

1/2 c. brown sugar
1/2 c. flour
3 T margarine


Pour over the apples in the pie crust. Bake at 400 for 15 minutes, then turn down to 350 until done - about 30 minutes more.

Sunday, April 24, 2011

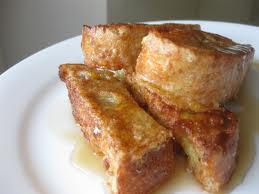
Caramel French Toast


I did not have one healthfully redeeming meal on Easter Sunday. I helped to serve the breakfast meal after Sunrise Service this morning at church. We had a family Easter meal after church. And, finally, we celebrated a couple of birthdays with that same branch of the family at suppertime, complete with homemade ice cream and a cake with an entire pound of butter in the frosting. By the end of the day, I didn't even feel treated by the birthday party.

What a fun-packed weekend, though. On Saturday morning I took Ava to the egg hunt put on by the Lion's Club in the wee village in which I grew up. I'm all the more charmed by it because it is exactly as I left it when I last hunted eggs myself nearly 30 years ago.

Ava's age group lined up at the section of the playground which was designated for them. The kids were thick on the end closest to the door from the gym where they had gathered at 9:00 AM. Not being the pushy type, Ava kept moving further down the line until we reached the very end, where there were no other kids. Interestingly, that left her with the entire east side of a playground full of plastic eggs where she might hunt in relative solitude.


...For about 48 seconds...

...Or until the heavily populated west end was picked clean and the swarms descended upon her.


Sunday brought a day of church and family. When we finally got to the family part, I could sit down for a spell and rest my feet. Lawd, those church shoes were not meant for cooking breakfast. Behold, the Easter toes.


While I like to make things from scratch and experiment with recipes, my friend Tammy is expert at feeding crowds. She has done many funeral dinners and Easter breakfasts at our church. We worked together to plan this year's menu. She made biscuits and yummy gravy and an awesome baked egg I'll have to tell you about later. I made French Toast. For weeks beforehand I wondered, should I make traditional French toast (needed: lots of griddle space and time to spend flipping) or baked (needed: lots of oven space that might be in short supply)?

Twenty hours before we were to serve, I decided to do the baked. Here is the recipe:

Caramel French Toast
In a heavy saucepan, combine the following:
1 c. brown sugar
1/2 c. butter
2 T light corn syrup

Cook over medium heat until thick. Pour into a 9 x 13 pan. Cover with 12 slices of bread. French bread is better and more dignified, but the sandwich bread here was donated by the parishioners, so beggars can't be choosey.


Combine the following and pour over the bread:

6 eggs, beaten
1-1/2 c. milk
1 t. vanilla
1/4 t. salt


Cover and chill overnight. Uncover and bake at 350 until set and golden brown. Serve immediately. Serves 6 generously.